

When to use
- Scale execution horizontally across many machines.
- Isolate workloads by environment, team, region, or hardware (e.g., GPU vs. CPU).
- Reach private resources by attaching self-hosted workers inside your network.
Task Queues vs Workers: A task queue is a waiting area for work. Workers are the execution engines that pull from queues and run agent workflows. Learn more about Workers.
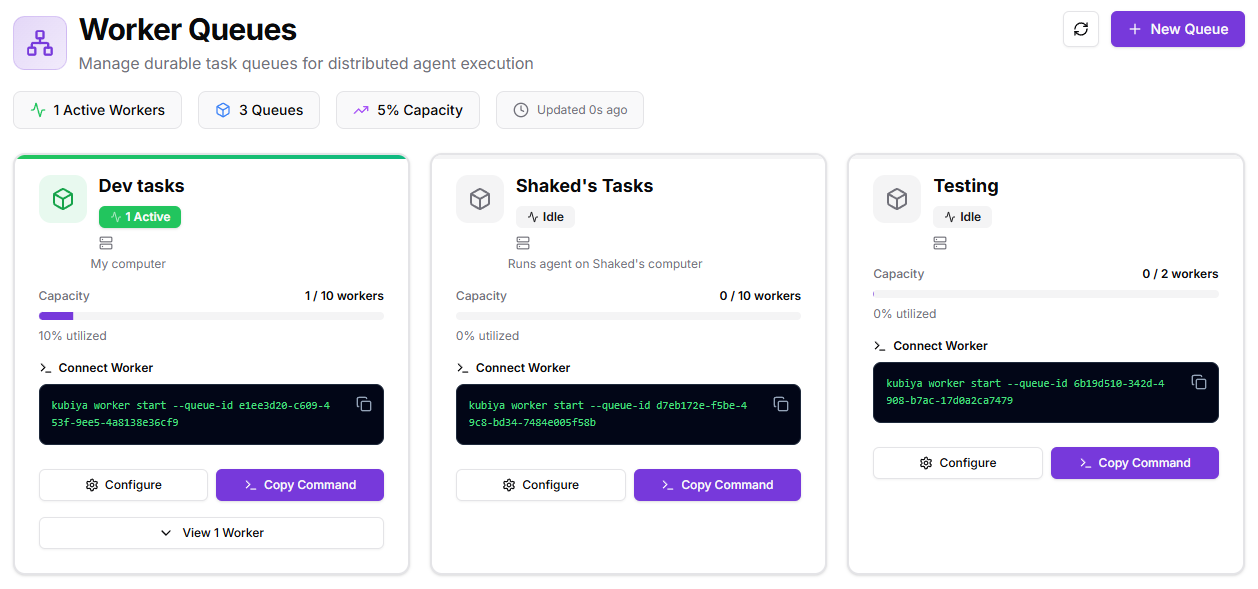
What you’ll see in the Dashboard
- KPI chips: Active Workers • Queues • Capacity • Last Updated.
- Queue cards (one per queue):
- Status (Active/Idle) and a capacity bar (e.g.,
1 / 10 workers). - Connect Worker area with a ready-to-copy command.
- Configure (edit name/description, control plane, max workers).
- View workers attached to this queue.
- Status (Active/Idle) and a capacity bar (e.g.,
- New Queue: creates another queue and gives you a fresh connection command.
How it works
- A Control Plane defines what capabilities are available (Skills, MCP servers, LLM settings, policies).
- An Agent or Team receives a task to execute.
- The task is routed to a Task Queue based on environment, priority, or explicit routing rules.
- Workers connected to that queue pull the task and begin execution.
- The worker executes the agent workflow in an isolated environment with streaming logs and audit trails.
- Results stream back to the Control Plane and user.
Selecting queues from Meta Agent
The Meta Agent provides a convenient way to select task queues directly from the chat interface. Click the server icon in the chat input bar to open the Remote Task Queues selector:- View all available task queues (e.g., Dev, Production, GPU workers)
- See worker capacity and availability for each queue
- Select a queue to route your task execution to specific infrastructure
- Access private resources — Route tasks to workers inside your VPC or private network
- Use specialized hardware — Direct GPU-intensive tasks to queues with GPU workers
- Target specific environments — Run tasks on production vs. staging infrastructure
- Distribute load — Manually select less-busy queues for urgent tasks
Create a new queue
- Click New Queue.
- Set a Queue Name and optional Display Name/Description.
Tip: name by purpose, e.g.,
staging,gpu-tasks,prod-eu. - Choose a Control Plane (Kubiya Cloud is the default, fully managed option).
- Set Max Workers (the max concurrent worker processes for this queue).
- Click Create Queue. You’ll get a Connect Worker command.
Add workers to a queue
Workers are managed through the Kubiya CLI. See the Workers page for a conceptual overview of what workers are and where they can run. Requirements: the target machine has Python 3 and the Kubiya CLI installed.- On the queue card, open Connect Worker and copy the command.
- Run it on any machine you want to contribute capacity from.
Example format:
kubiya worker start --queue-id <QUEUE_ID> - Repeat on more machines to scale out.
- Each started worker process consumes one worker slot.
- The same machine may join multiple queues if resources allow.
Good defaults & tips
- Keep max workers modest at first; raise as your team’s throughput grows.
- Use separate queues for boundaries (prod vs. staging, region, GPU, high-risk tasks).
- Add a clear description so teammates know what belongs on the queue.
For worker concepts and lifecycle management, see Workers. For technical deployment details and advanced configurations, see Worker Management CLI.
Security & isolation
- Steps execute in containers with the environment’s configured context, policies, and Skills.
- For self-hosted workers, restrict the host’s access to only what the queue needs.
- Rotate credentials and remove idle workers by stopping the worker process on that host.
Troubleshooting
- Worker won’t connect: verify Python 3 + CLI are installed; re-copy the exact command; check outbound network access.
- Jobs stuck in queue: ensure at least one online worker and that capacity isn’t zero.
- “No capacity” warnings: increase Max Workers or attach more machines.
- Slow runs: add more workers or split work across additional queues.