> ## Documentation Index
> Fetch the complete documentation index at: https://docs.kubiya.ai/llms.txt
> Use this file to discover all available pages before exploring further.
# Overview
> Central coordination layer for routing, shared configuration, policies, and observability across Kubiya. Use hosted or self‑hosted planes to isolate workloads, enforce guardrails, and scale.
The control plane is the coordination layer for everything that runs in Kubiya. It owns routing, shared configuration, and policy enforcement. Anything you create: agents, teams, environments, workflows, and task queues, lives inside the currently selected control plane.
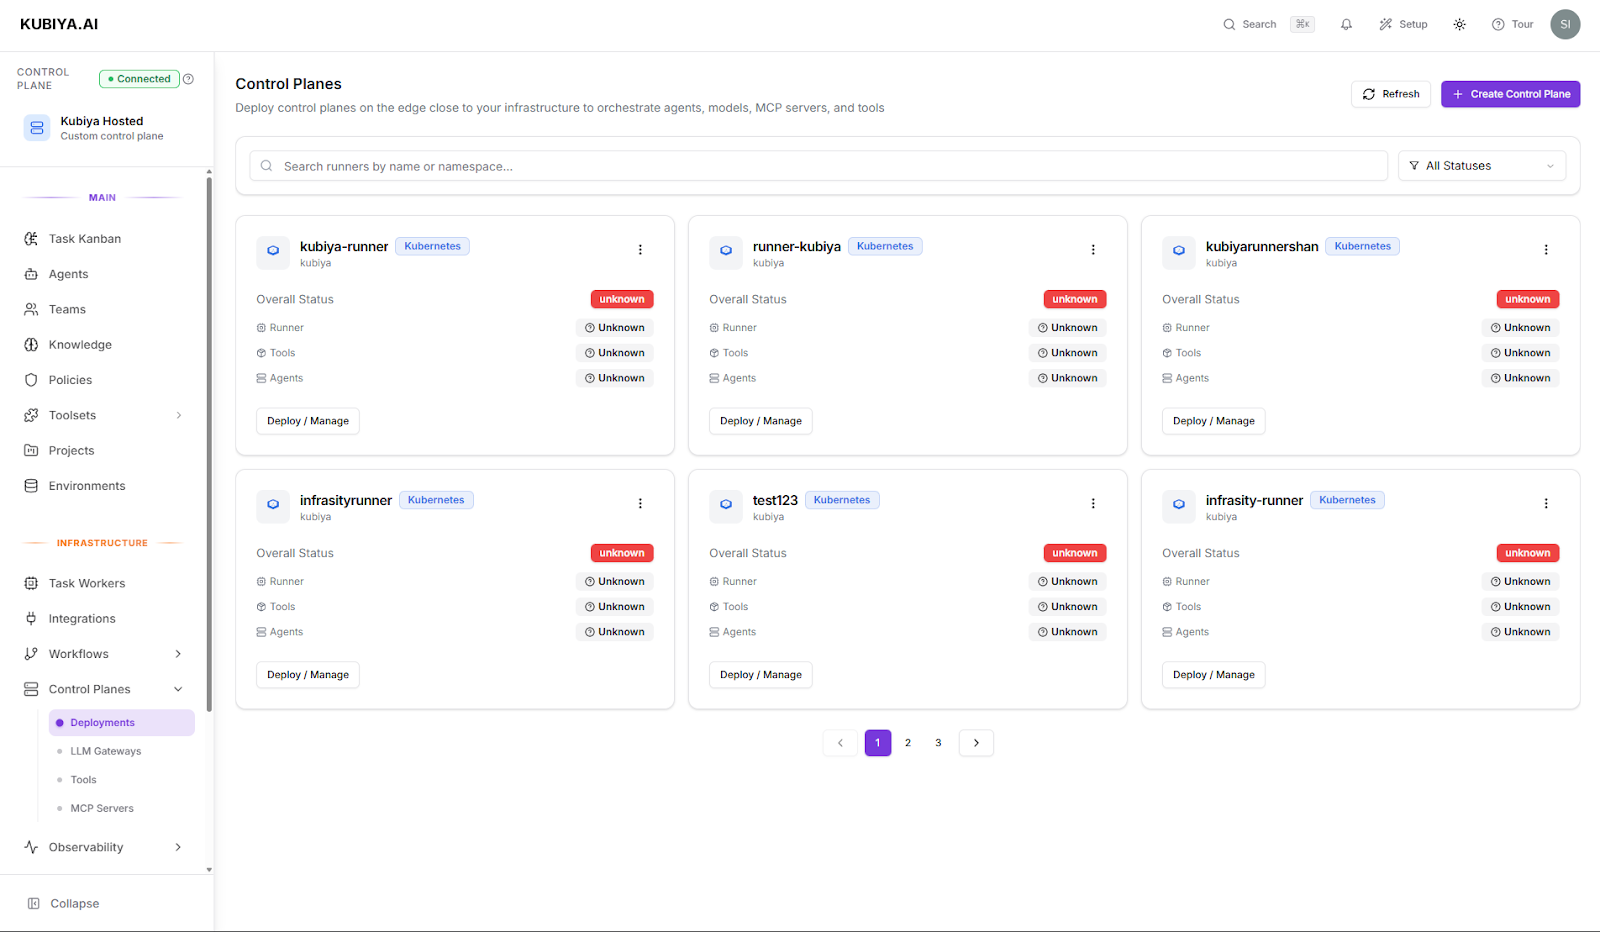 You can use the **Kubiya Hosted** control plane (fully managed) or deploy **Self-Hosted** control planes in your own infrastructure.
## **What it does**
* **Orchestration & routing** – Receives tasks from the Composer and sends them to the right task queue.
* **Configuration hub** – Central place for:
* Tool definitions and **Skills**
* **MCP server** connections
* **LLM gateways** / model routing
* Organization **policies** and guardrails
* Integrations and credentials (attached through **Environments**)
* **Context registry** – Surfaces your **Projects**, **Teams**, **Environments**, and **Policies** so agents run with the right context.
* **Observability & audit** – Streams status/logs and keeps a complete execution history per plane.
## **Hosted vs. Self-Hosted**
* **Kubiya Hosted (Managed)** – Fastest way to start and evaluate. Best for internet-reachable workloads. Zero ops burden.
* **Self-Hosted Control Plane** – Use when you need VPC-only access, compliance boundaries, or custom integrations. Full access to private resources; you operate and scale it.
Most orgs mix both: begin on Hosted and add one or more Self-Hosted planes for sensitive or high-throughput work.
## **Scope & isolation**
* The **selected control plane** is the active scope for the UI. New objects are created in that plane.
* Objects and executions **do not cross planes**. Switching planes does not move tasks or data.
* Common patterns: one hosted plane for experimentation; dedicated self-hosted planes per region/business unit.
## **What you’ll configure**
When creating a self-hosted plane, you’ll choose:
* **Deployment platform**
* Enterprise: **Kubernetes Operator** (recommended), **OpenShift Operator**
* Serverless (zero infra mgmt): **Vercel**, **GCP Cloud Run**, **AWS Lambda**, **Cloudflare Workers**
* **Resource profile** – Minimal (dev), Standard (prod), or High Performance
* **Security & RBAC** – Cluster-wide access (optional), network policies, run-as-non-root
* **Storage** – Enable persistent storage and pick a storage class
* **Components** – Workflow Engine, Dagger Runtime (container tool execution), Image Updater
* **Monitoring & telemetry** – Prometheus metrics and OpenTelemetry tracing
## **Create a control plane**
1. **Open**: In the left nav, go to **Infrastructure > Control Planes** and click **Create Control Plane** (or use the control-plane switcher at the top-left and choose **Create Self-Hosted Control Plane**).
2. **Choose your deployment platform**:
* *Kubernetes/OpenShift* for full control and observability.
* *Serverless* options for zero-ops evaluation or lightweight workloads.
3. **Basic setup**:
* **Name** – Unique, lowercase; shown across the UI.
* **Deployment target** – Pre-selected by the platform you chose.
* **Resource profile** – Minimal / Standard / High Performance.
* **Options** – Toggle **Persistent storage** (recommended for prod), **Monitoring & telemetry**, and **Cluster-wide access** (only if tools require cross-namespace access).
4. **Advanced configuration** (optional):
* **Security & RBAC** – Network policies; run as non-root; scope cluster-wide access if needed.
* **Storage** – StorageClass and retention.
* **Components** – Enable/disable Workflow Engine, Dagger Runtime, Image Updater.
* **Telemetry** – Prometheus + OpenTelemetry; scrape interval.
5. **Generate install assets**: Click **Create Control Plane**. The UI produces a platform-specific config (e.g., a `values.yaml`) and an install command.
* *Kubernetes/OpenShift*: run the shown command (Helm/Operator) with permissions to create namespaces, deployments, services, PVCs, and (if enabled) cluster-wide roles.
* *Serverless*: follow the shown deploy command/link for your provider.
6. **Verify readiness**: After deployment, the plane appears in **Control Planes** with a **Ready** status. From here you can:
* Register **LLM Gateways** and **MCP Servers**
* Create **Skills**
* Set **Policies**
* Proceed to **Environments**, **Agents**, **Teams**, **Projects**, and **Task Queues**
## **Good defaults**
* Start on **Kubiya Hosted**; add self-hosted planes as needs grow.
* Enable **Persistent storage** for anything beyond quick trials.
* Keep **Cluster-wide access** off unless a tool genuinely needs it; prefer namespace-scoped access.
* Turn on **OpenTelemetry** to integrate traces with your observability stack.
## **Notes & migration**
* Execution capacity comes from **Task Queues** attached to the plane.
* Executions are **deterministic and step-isolated**; failures are contained to the failing step and visible in audit logs.
* To move assets between planes, export/import workflows and recreate dependent objects (environments, Skills, policies) on the target plane.
You can use the **Kubiya Hosted** control plane (fully managed) or deploy **Self-Hosted** control planes in your own infrastructure.
## **What it does**
* **Orchestration & routing** – Receives tasks from the Composer and sends them to the right task queue.
* **Configuration hub** – Central place for:
* Tool definitions and **Skills**
* **MCP server** connections
* **LLM gateways** / model routing
* Organization **policies** and guardrails
* Integrations and credentials (attached through **Environments**)
* **Context registry** – Surfaces your **Projects**, **Teams**, **Environments**, and **Policies** so agents run with the right context.
* **Observability & audit** – Streams status/logs and keeps a complete execution history per plane.
## **Hosted vs. Self-Hosted**
* **Kubiya Hosted (Managed)** – Fastest way to start and evaluate. Best for internet-reachable workloads. Zero ops burden.
* **Self-Hosted Control Plane** – Use when you need VPC-only access, compliance boundaries, or custom integrations. Full access to private resources; you operate and scale it.
Most orgs mix both: begin on Hosted and add one or more Self-Hosted planes for sensitive or high-throughput work.
## **Scope & isolation**
* The **selected control plane** is the active scope for the UI. New objects are created in that plane.
* Objects and executions **do not cross planes**. Switching planes does not move tasks or data.
* Common patterns: one hosted plane for experimentation; dedicated self-hosted planes per region/business unit.
## **What you’ll configure**
When creating a self-hosted plane, you’ll choose:
* **Deployment platform**
* Enterprise: **Kubernetes Operator** (recommended), **OpenShift Operator**
* Serverless (zero infra mgmt): **Vercel**, **GCP Cloud Run**, **AWS Lambda**, **Cloudflare Workers**
* **Resource profile** – Minimal (dev), Standard (prod), or High Performance
* **Security & RBAC** – Cluster-wide access (optional), network policies, run-as-non-root
* **Storage** – Enable persistent storage and pick a storage class
* **Components** – Workflow Engine, Dagger Runtime (container tool execution), Image Updater
* **Monitoring & telemetry** – Prometheus metrics and OpenTelemetry tracing
## **Create a control plane**
1. **Open**: In the left nav, go to **Infrastructure > Control Planes** and click **Create Control Plane** (or use the control-plane switcher at the top-left and choose **Create Self-Hosted Control Plane**).
2. **Choose your deployment platform**:
* *Kubernetes/OpenShift* for full control and observability.
* *Serverless* options for zero-ops evaluation or lightweight workloads.
3. **Basic setup**:
* **Name** – Unique, lowercase; shown across the UI.
* **Deployment target** – Pre-selected by the platform you chose.
* **Resource profile** – Minimal / Standard / High Performance.
* **Options** – Toggle **Persistent storage** (recommended for prod), **Monitoring & telemetry**, and **Cluster-wide access** (only if tools require cross-namespace access).
4. **Advanced configuration** (optional):
* **Security & RBAC** – Network policies; run as non-root; scope cluster-wide access if needed.
* **Storage** – StorageClass and retention.
* **Components** – Enable/disable Workflow Engine, Dagger Runtime, Image Updater.
* **Telemetry** – Prometheus + OpenTelemetry; scrape interval.
5. **Generate install assets**: Click **Create Control Plane**. The UI produces a platform-specific config (e.g., a `values.yaml`) and an install command.
* *Kubernetes/OpenShift*: run the shown command (Helm/Operator) with permissions to create namespaces, deployments, services, PVCs, and (if enabled) cluster-wide roles.
* *Serverless*: follow the shown deploy command/link for your provider.
6. **Verify readiness**: After deployment, the plane appears in **Control Planes** with a **Ready** status. From here you can:
* Register **LLM Gateways** and **MCP Servers**
* Create **Skills**
* Set **Policies**
* Proceed to **Environments**, **Agents**, **Teams**, **Projects**, and **Task Queues**
## **Good defaults**
* Start on **Kubiya Hosted**; add self-hosted planes as needs grow.
* Enable **Persistent storage** for anything beyond quick trials.
* Keep **Cluster-wide access** off unless a tool genuinely needs it; prefer namespace-scoped access.
* Turn on **OpenTelemetry** to integrate traces with your observability stack.
## **Notes & migration**
* Execution capacity comes from **Task Queues** attached to the plane.
* Executions are **deterministic and step-isolated**; failures are contained to the failing step and visible in audit logs.
* To move assets between planes, export/import workflows and recreate dependent objects (environments, Skills, policies) on the target plane.